
Before running test cases, make sure all test devices (Golden and DUT) are attached to the Windows machine with the installed GRL Test Harness and Harness Automation Tool.
Using the Harness Automation Tool
All test cases are run from the tools/harness-automation directory. There are
two methods:
start.sh— Using Bash, which is bundled with Git for Windowsstart.bat— From the Windows command line (cmd)
To run all test cases:
./start.sh
./start.bat
To run individual test cases (names are case-sensitive):
./start.sh Router_5_1_1 Leader_5_1_1
./start.bat Router_5_1_1 Leader_5_1_1
Using the GRL Test Harness
After the test bed is configured, batches of test cases are run based on the selected role of the DUT. The Test Selection section lists all available test cases for the selected role under Test Plan:
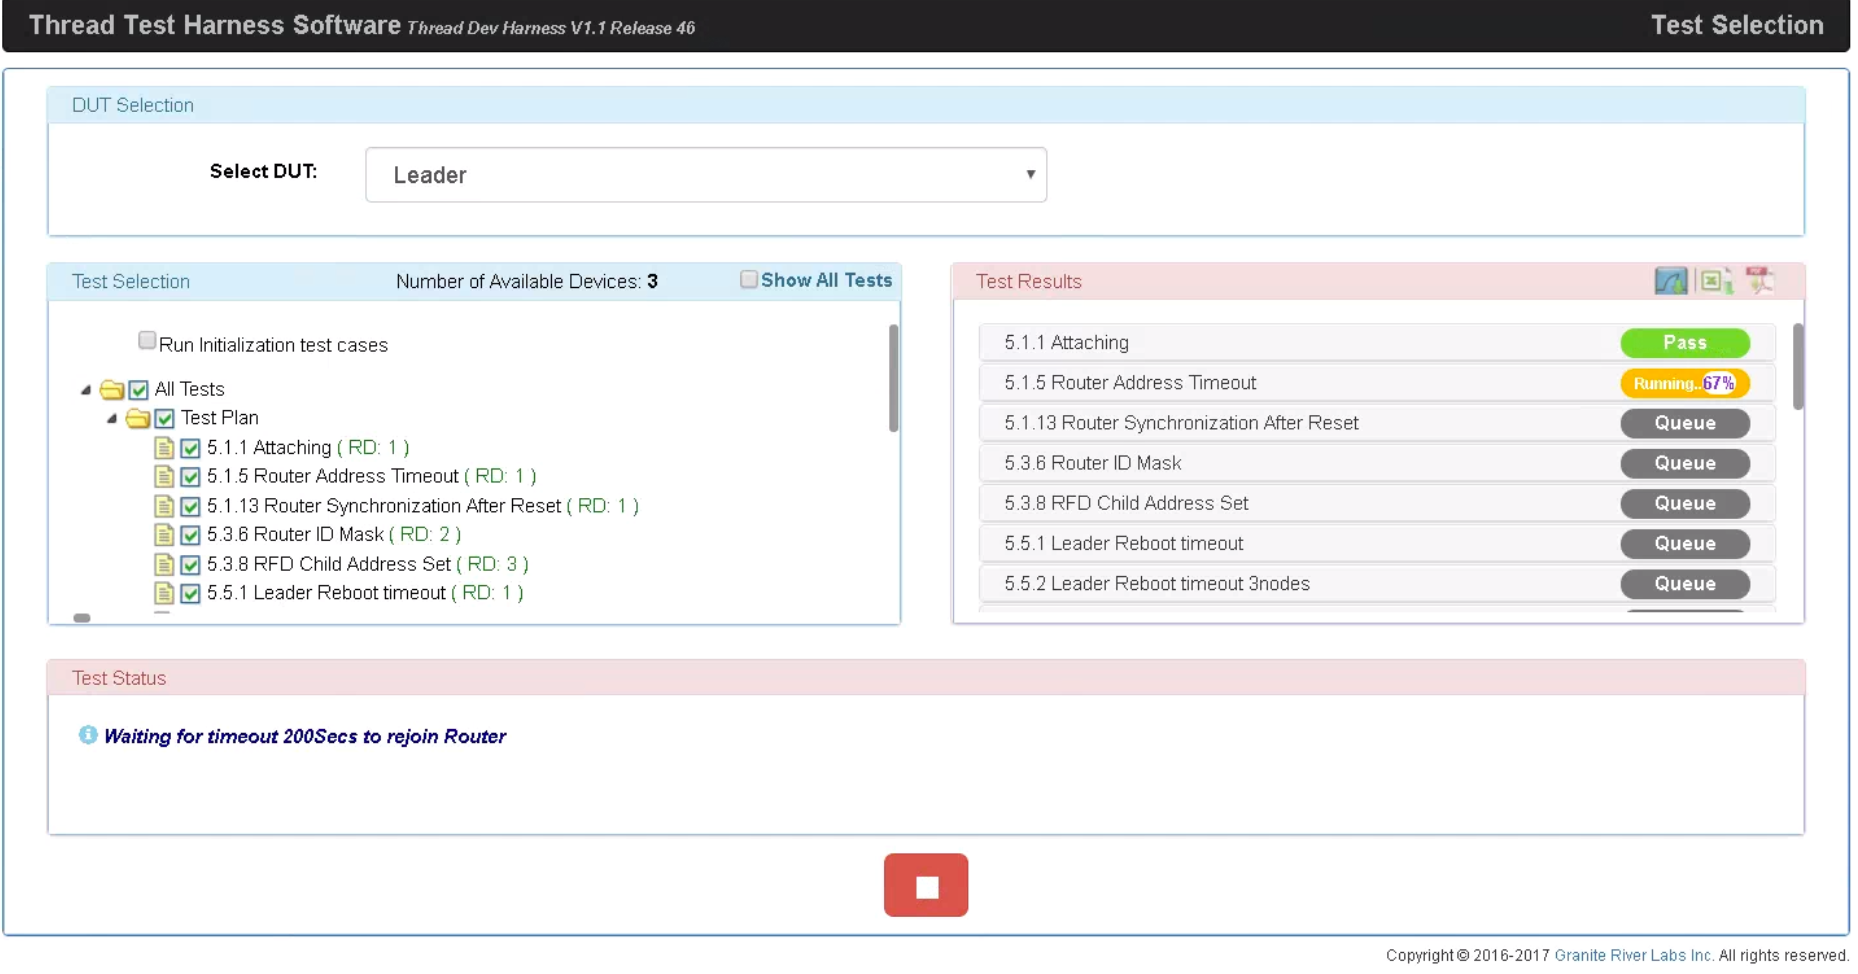
Select test cases as desired, then click the green play button to execute.
Manual test operations
The Test Harness prompts the user for manual input during some test cases.
Network credentials
For test cases in Sections 5, 6, 7, and 9 of the Test Plan, network credentials must be configured out-of-band. For example:
Parameter configuration during device bring-up:
panid 0xface Donechannel 20 Donenetworkname GRL Doneextpanid 000db80000000000 Done
"DUT as Leader" configuration, prior to bringing up the interface:
dataset activetimestamp 1 Donedataset commit active Done
"DUT as End Device" configuration:
mode rsn
Done
"DUT as SED" configuration, where the pollperiod (in milliseconds) is set to
the default SedPollingRate in the Test Harness:
mode s Donepollperiod 5000 Done
Bring up the Thread interface and stack:
ifconfig up Donethread start Done
Commissioner role setup
For test cases in Section 8 of the Test Plan, configure the Commissioner role.
Start the commissioner after bringing up the Thread stack:
commissioner start
Done
Add steering data:
commissioner joiner add eui64 THREADJPAKETEST 200
The eui64 is the factory-assigned IEEE EUI-64 identifier, obtained via the
eui64 CLI command. THREADJPAKETEST is the Joiner Credential, which
is used to generate the Pre-Shared Key for the Device (PSKd). The Joiner is
removed from steering data after the configured timeout.
We recommend using 500 as the timeout value during the 8.2.x Commissioner
test cases.
Start the Joiner role after bringing up the Thread interface, using the Joiner
Credential default of THREADJPAKETEST:
joiner start THREADJPAKETEST
Start the Joiner role after bringing up the Thread interface, using the specified provisioning URL:
joiner start THREADJPAKETEST www.threadgroup.org
Other input
The Test Harness may prompt for other manual operations, and provide values (such as an IPv6 address) for use in those operations. Use the following OpenThread CLI commands if prompted for:
| Prompt | CLI command |
|---|---|
| Extended address | extaddr |
| IPv6 addresses | ipaddr |
| Joiner factory MAC address | eui64 |
| Set the Commissioner provisioning URL | commissioner provisioningurl www.threadgroup.org |
| Factory reset | factoryreset |
| Get all TLVs | dataset mgmtgetcommand active address ipv6-address |
| Get Network ChannelMask (0x35), MeshLocal ULA prefix (0x07), Network Name (0x03) | dataset mgmtgetcommand active address ipv6-address binary 350703 |
| Get Network Channel (0x00), MeshLocal ULA prefix (0x07), Network Name (0x03), Scan Duration (0x38), Energy List (0x39) | dataset mgmtgetcommand active address ipv6-address binary 0007033839 |
For a list of all CLI commands, see the OpenThread CLI Reference.
Certification tips
Enable device selection for the mixed test bed
During Thread Certification testing, mixed test beds featuring reference stacks
from ARM, NXP, Silicon Labs, and OpenThread are used. Test bed topologies are
defined in the C:\GRL\Thread1.1\Thread_Harness\TestScripts\TopologyConfig.txt
file.
To enable device selection in order to perform a test case with the same exact
reference platforms as the Thread Group's ATL would, set the
EnableDeviceSelection parameter in the
C:\GRL\Thread1.1\Config\Configuration.ini file to True.
EnableDeviceSelection = True
RF shielding
For test cases 9.2.9 (Leader, Router) and 9.2.10 (Router, ED1, SED1), special care is needed to ensure the correct devices are RF-shielded. Assuming all devices are configured in the roles as each test requires:
- Start the Test Harness with only the NXP Sniffer attached to the Windows machine. This avoids device auto discovery by the Test Harness.
- Plug in the test devices one by one and note their corresponding serial port.
- Place one of the following groups of devices in the RF shield box:
- For test 9.2.9:
- Leader and Commissioner
- Router1, Router2, and Sniffer
- For test 9.2.10:
- Leader and Commissioner
- Router, ED, SED, and Sniffer
- For test 9.2.9:
- On the Configure Test Bed page of the Test Harness, configure each
device for the following sort order in the Test Bed section, depending
on the test case:
Final device sort order for RF shielding test cases 9.2.9 1. Router2
2. Commissioner
3. Router1
4. Leader9.2.10 1. SED
2. ED
3. Router1
4. Commissioner
5. Leader- Clear the Test Bed section of any existing devices.
- Drag the appropriate devices for the specific test case topology from the Supported Hardware section on the left to the Test Bed section on the right. Make sure to drag them in the reverse order of the final sort order. For example, for test case 9.2.9, drag the Leader first, then Router1 second, and so on. If you drag the wrong device, clear the devices in the Test Bed section and start again.
- In the Test Bed section, fill in the serial number or IP information for each device in the final sort order. For example, for test case 9.2.9, after dragging, the first device is Router2, the second is Commissioner, and so on.
- Select the Enable Auto DUT Device Selection checkbox below the Supported Hardware list.
- Select the Set as DUT radio button for the DUT.
- Select Connect All to initiate device discovery.
- Execute the test case (9.2.9 or 9.2.10). Shield and unshield each group of devices as prompted by the Test Harness.