
1. Introduction
What is Thread & OTNS
Thread is an IP-based low-power wireless mesh networking protocol that enables secure device-to-device and device-to-cloud communications. Thread networks can adapt to topology changes to avoid a single point of failure.
OpenThread released by Google is an open-source implementation of Thread. Despite its small code size and memory footprint, OpenThread supports all features defined in the Thread Specification.
OpenThread Network Simulator (OTNS) can be used to simulate Thread networks by running simulated OpenThread nodes on posix platforms. OTNS provides an easy-to-use Web interface (OTNS-Web) for visualizing and operating simulated Thread networks. Scripted simulations (with Python) is also possible.
What you'll learn
- Install OTNS and its dependencies
- Get to know the basics of the OTNS-CLI
- How to add/move/delete OpenThread nodes in OTNS-Web
- Use OTNS-Web's other useful features to control the network simulation
- Verify OpenThread's no-single-point-of-failure
- See the data traffic between OpenThread nodes in Wireshark
This codelab is focused on OTNS-CLI and OTNS-Web for interactive use. OTNS's other features, such as Python scripting, are not covered.
What you'll need
- Thread Primer. You will need to know the basic concepts of Thread to understand what is taught in this Codelab.
- Preferably Linux x86_64, or Mac OS with Homebrew. Ubuntu version 24 or higher in Windows WSL2 should also work but may require some manual tweaking of settings.
- Git.
- Web browser. OTNS-Web uses a web browser for displaying simulations.
- Wireshark network protocol analyzer (optional).
- Go version 1.23 or higher.
- The installation script will check for the installed Go version.
- If Go is not installed, it will install a version >= 1.23, if available from the package manager.
- If not available from the package manager, manual installation is required.
- Note that Ubuntu 24.04 or lower does not support Go 1.23 automatically. See the Available Golang versions page in the Ubuntu documentation for details. Manual installation, using
snap, or other procedures, is possible.
- Python version 3.9 or higher.
- The installation script will check for the installed Python version.
- If Python 3 is not yet installed, it will install a version >= 3.9 if available from the package manager.
- If not available from the package manager, manual installation is required.
Terminology
The term "Router" is used as the technical term for the Thread Mesh Extender, which was initially called a Thread Router. "Node" refers to any simulated OpenThread device in an OTNS simulation.
2. Installation
Get OTNS code
$ git clone https://github.com/openthread/ot-ns.git ./otns
$ cd otns
All subsequent console commands in this Codelab are run from the otns directory.
Bootstrap and install
The bootstrap script will install dependencies (including Python 3 and Go/Golang, if needed) and install OTNS. Note that the script may stop if it is unable to automatically install certain dependencies, such as Python version >= 3.9 or Go version >= 1.23. Automatic installation requires that the packages can be found in the operating system's configured package repository.
The script also builds the various OT node types that can be used directly in a simulation, and it performs some basic tests. Due to these node builds, it can take several minutes.
$ ./script/bootstrap
....
....
OTNS installed - use 'otns' to start it.
$
You might be asked to input a password for sudo during execution of the script.
If otns is not properly installed
The script may report an error like:
....
OTNS installed - please add ~/go/bin to your PATH variable first, to use it.
$
In this case, you need to add $(go env GOPATH)/bin to your $PATH variable.
In case of other errors, a GitHub issue can be created.
3. Run OTNS for the first time
Run otns:
$ otns
>_ ← OTNS-CLI prompt
When successfully started, OTNS will enter a CLI console (OTNS-CLI) and launch a web browser for network visualization and management (OTNS-Web):

If you can only see a blank page for OTNS-Web, chances are WebGL is not enabled in your browser. Please refer to https://superuser.com/a/836833 on how to enable WebGL.
In the following sections, you are going to learn to manage OTNS simulations through OTNS-CLI and OTNS-Web.
4. Get to Know OTNS-CLI & OTNS-Web
OTNS-CLI
OTNS-CLI is the Command Line Interface (CLI) for managing OTNS simulations.
$ otns
>_ ← OTNS-CLI prompt
You can type in commands through OTNS-CLI. Refer to the OTNS CLI reference for a full list of commands. Don't worry, you are only going to use a few of these commands in this Codelab.
Type the help command for an overview of CLI commands. This list is identical to the CLI reference.
> help
add             Add a node to the simulation and get the node ID.
....
....
Done
>
To get more help on a specific command, use the command's name, for example:
> help add
add
  Add a node to the simulation and get the node ID.

Definition:
....
....
>
OTNS-Web
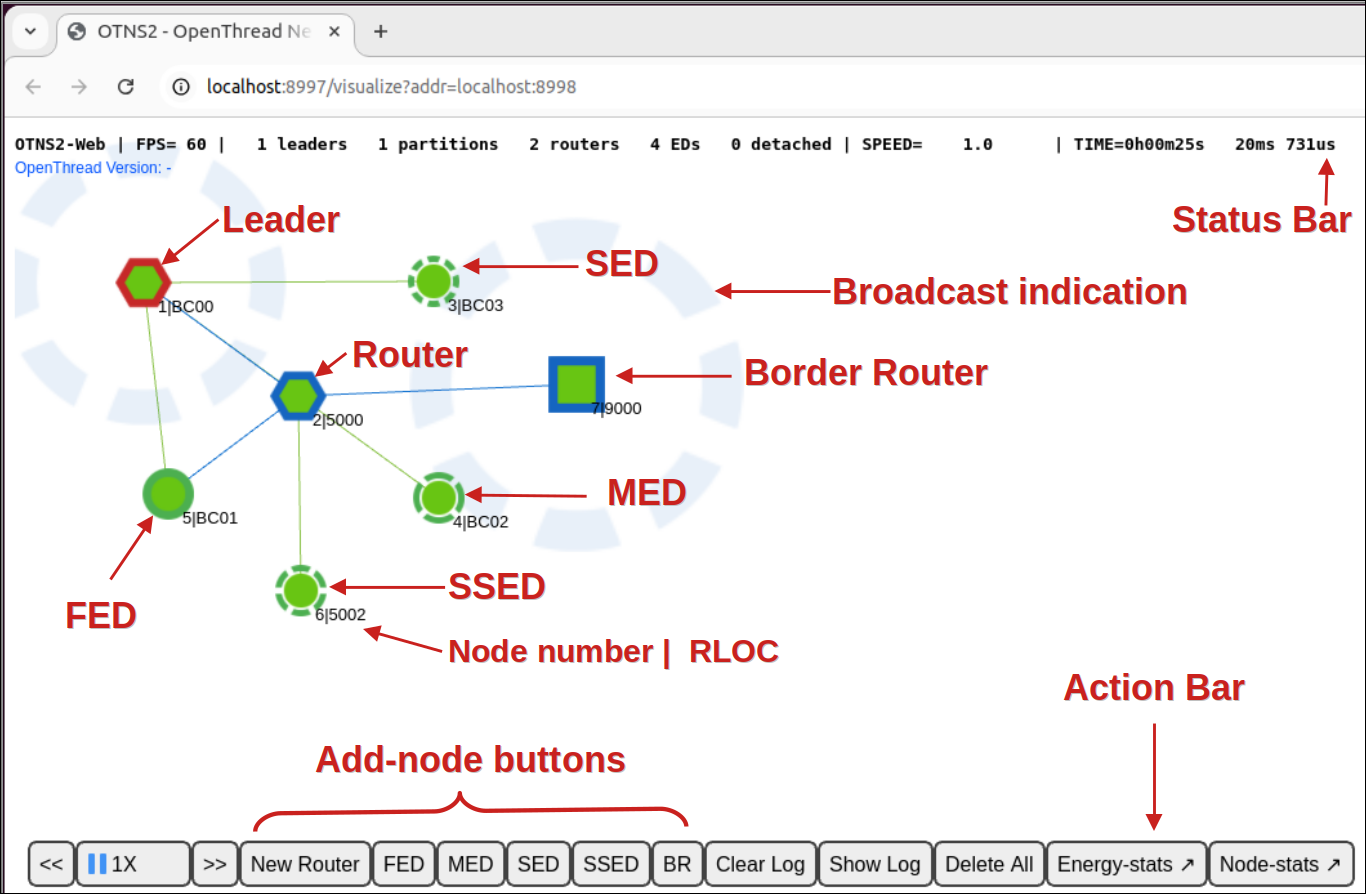
OTNS-Web is OTNS's network visualization and management tool. It provides a visual representation of the nodes, messages, and links of the simulated Thread network. Note the various elements of OTNS-Web:
5. Add Nodes
Add nodes through OTNS-CLI
Add a Thread Router into the simulation:
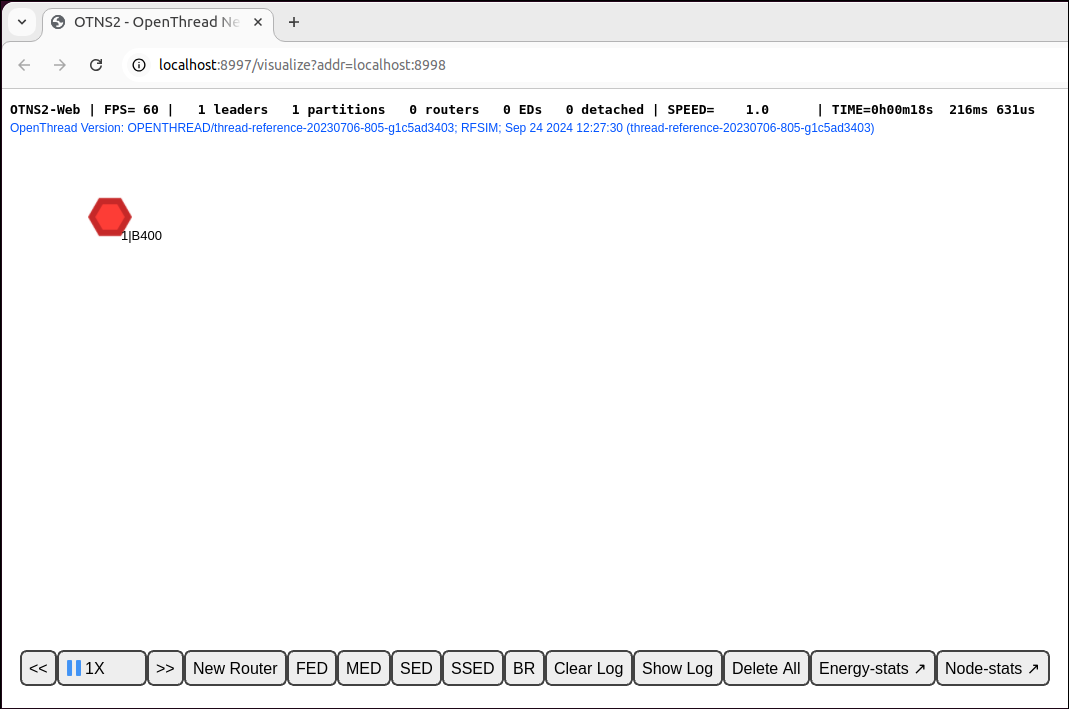
> add router
1
Done
You should see a node created in OTNS-Web. The node starts as a Router and becomes a Leader in a few seconds:
To make it easy to start simulations interactively, each new OpenThread node is by default commissioned with a standard set of network parameters.
Add more nodes through OTNS-CLI
Now we will add some nodes of different types.
> add fed
2
Done
> add med
3
Done
> add sed
4
Done
Wait a few seconds for nodes to merge into one partition. You should see the nodes in OTNS-Web:

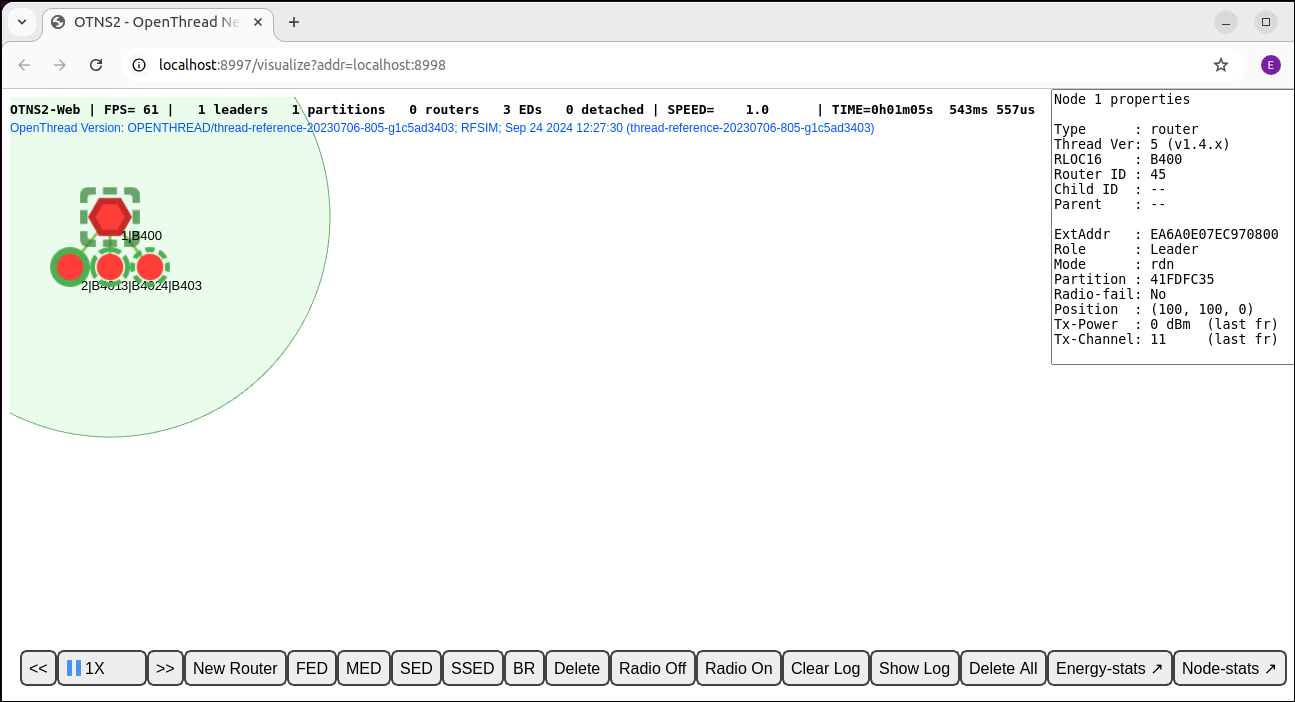
Also in OTNS-Web, it's possible to select any of the nodes to get a panel with more information about the node. For example, in the below figure node 1 is selected. The "Role" entry in the panel confirms that it is a Leader.
Add nodes by OTNS-Web
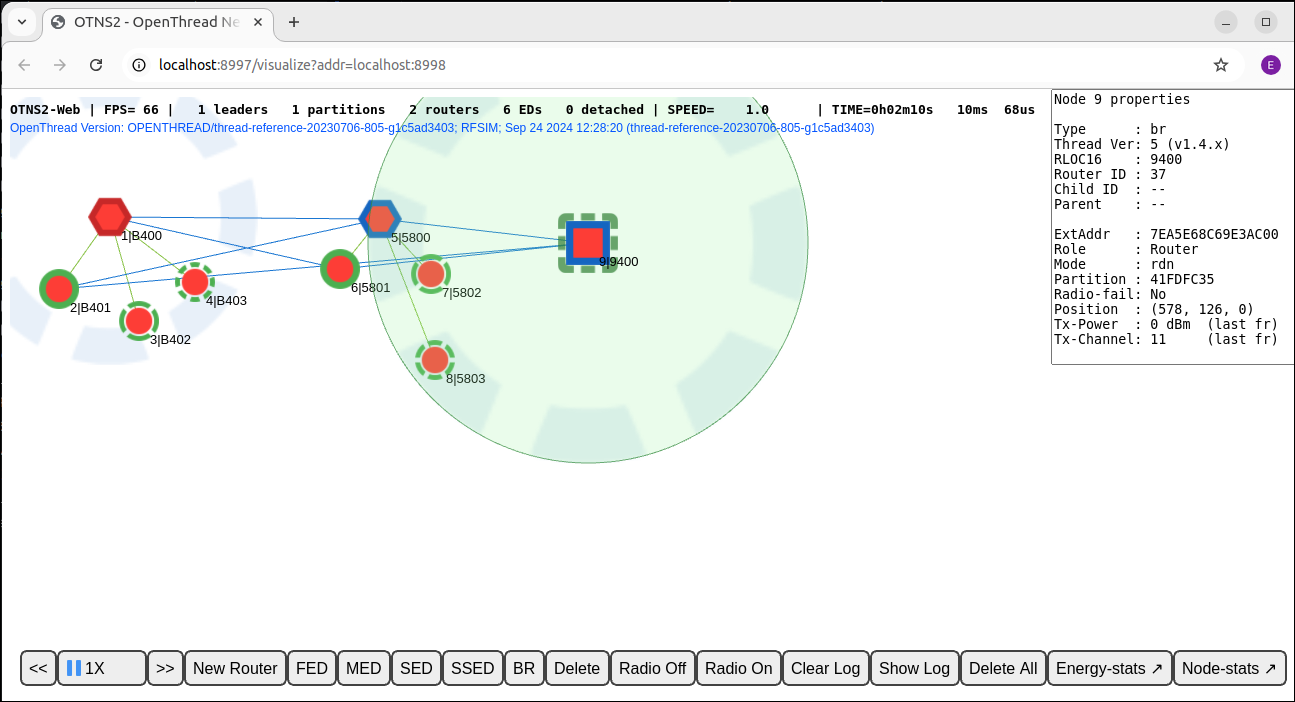
You can also add nodes through OTNS-Web. Click the New Router button of the Action Bar. You should see a node being created to the right of the selected node. The new router should join the existing Thread partition:
Also click the FED, MED, SSED, and BR buttons on the Action Bar to create these other types of nodes. There should now be 9 nodes in total. If you want, drag some nodes around to other positions, to create a different physical network topology.
Now you have created a Thread network of one partition that contains many nodes. In the next section, we are going to adjust the simulating speed to make the simulation run faster.
6. Adjust Speed
Currently, the simulation should be running at 1X speed, meaning that the simulating time elapsed so far is the same as the actual time since we created the first node.
Adjust speed through OTNS-CLI
You can adjust the simulating speed through OTNS-CLI.
Set simulating speed to 100X
> speed 100
Done
You should see the nodes send messages much more frequently than before.
Set simulating speed to MAX
> speed max
Done
Now, OTNS is trying it's best to simulate as fast as it can, so you should see nodes sending a great number of messages.
Pause simulation
> speed 0
Done
Setting simulating speed to 0 pauses the simulation.
Restore simulation at normal speed
> speed 1
Done
Setting simulating speed to a value larger than 0 resumes the simulation.
Adjust speed through OTNS-Web
Speed control buttons
Find the speed control buttons 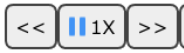 on the
 Action Bar. The buttons show the current simulating speed and can be used to adjust simulating speed and pause/resume the simulation.
Speed up simulation
You can speed up the simulation by clicking the  button until the speed reaches
 MAX: 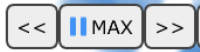 .
.
Slow down simulation
You can slow down the simulation by clicking the  button.
Pause simulation
Click the  button to pause the simulation when it's running. The button will be changed to
  .
.
Resume simulation
Click the button to resume the simulation when it's paused. The button will be changed back to .
Set simulating speed to 10X
In order to save time, use
OTNS-CLI to adjust the simulating speed to
10X so that we can observe topology changes in the network much faster.
> speed 10
Done
7. Turn On/Off Radio
Now, the simulation should contain at least 2 Routers (hexagon shape), possibly a Border Router (square shape) and many children, and runs at 10X speed.
Find the current Leader (red border) of the 2 Routers, single click to select it:
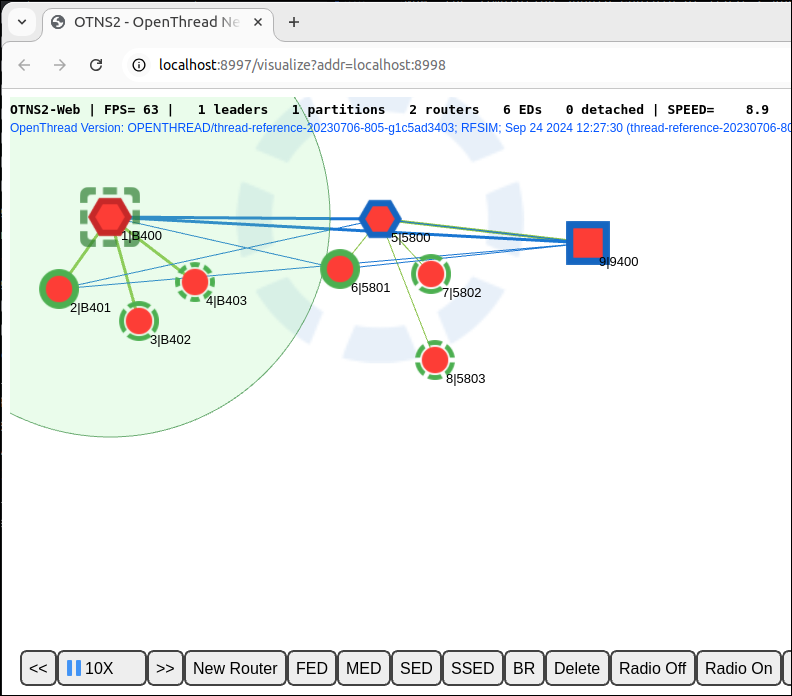
Turn off radio
Click the 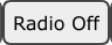 button on the Action Bar to turn off the radio of the Leader node. The Leader won't be able to send or receive messages with the radio off.
Wait for about 12s (120s in simulating time) for the other Router or Border Router to become the new Leader:
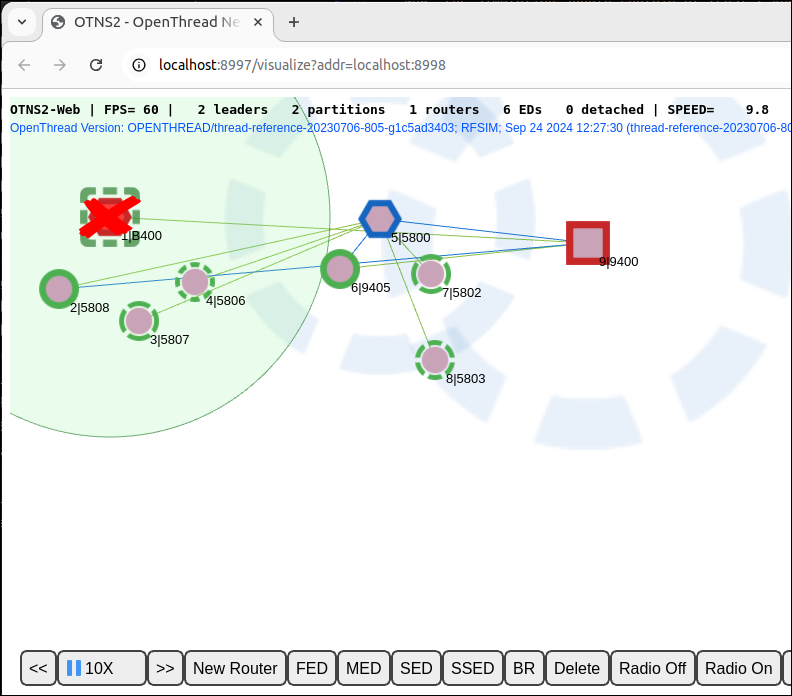
The Thread network recovers from Leader failure automatically by forming a new partition with a new Leader. The new partition also has a new partition color.
Turn on radio
Select the Leader whose radio was turned off. Click the 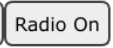 button on
 Action Bar to restore radio connectivity:
The Leader should reattach to the network after radio connectivity is restored.
8. Move Nodes
OTNS enables users to move nodes easily through OTNS-CLI or OTNS-Web.
Move node through OTNS-CLI
Move the Border Router node 9 to a new location:
> move 9 50 50
Done
Move node through OTNS-Web
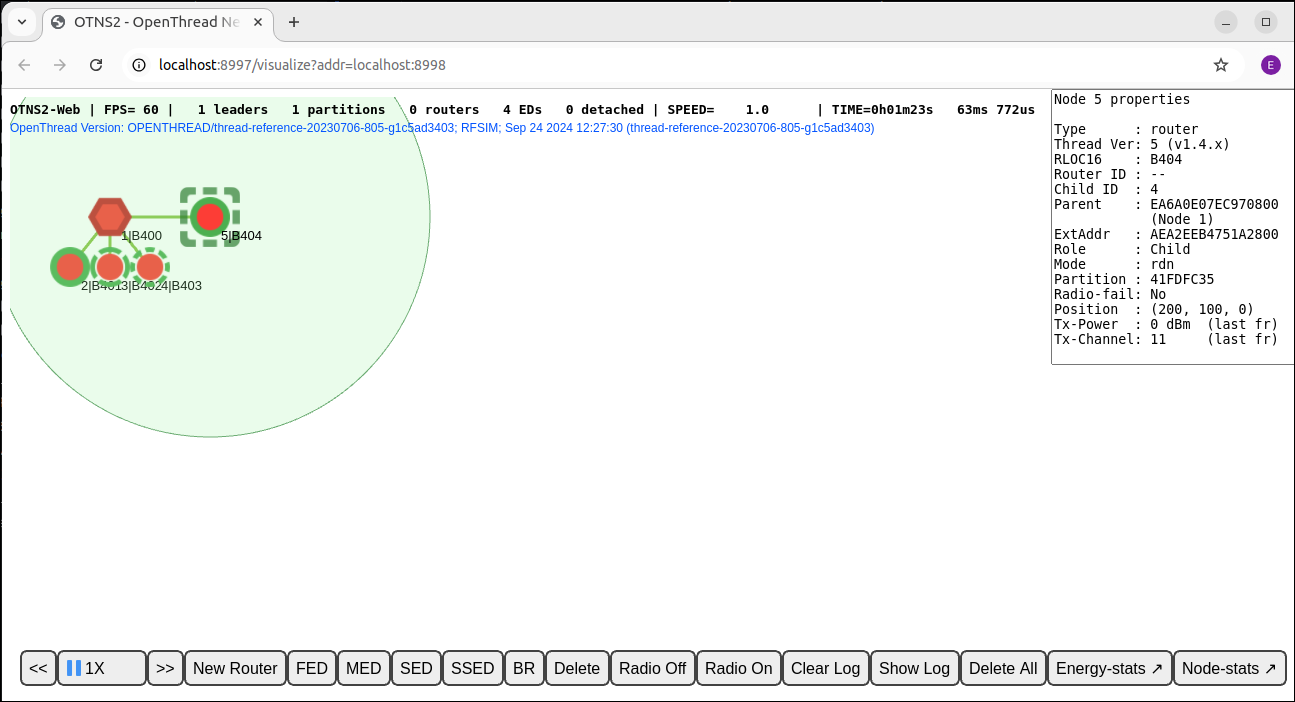
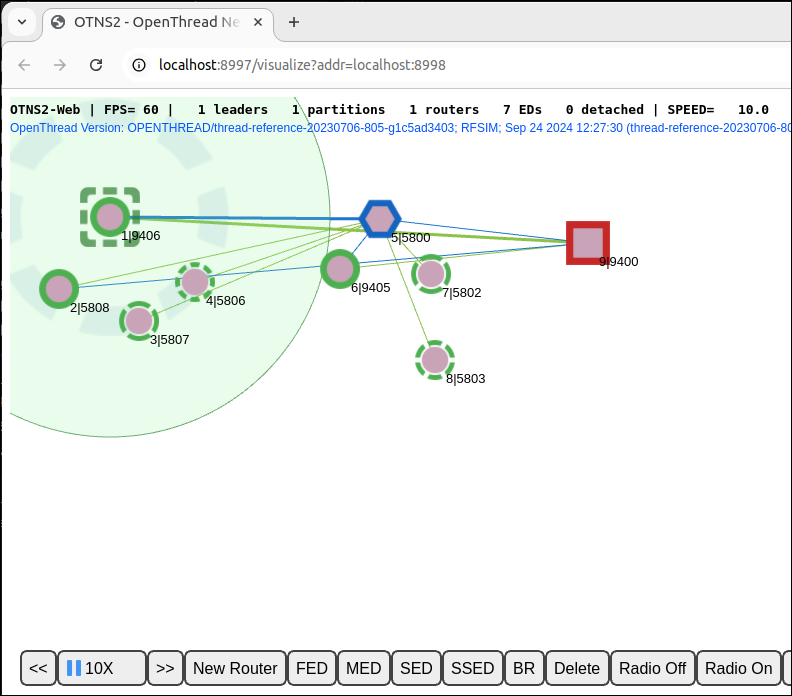
Move node 5 all the way to the bottom right, by dragging. Because node 5 is now out of radio coverage of the other Routers, it forms its own partition with a new Partition ID. The Partition IDs can be checked on the node information panel by clicking the nodes.
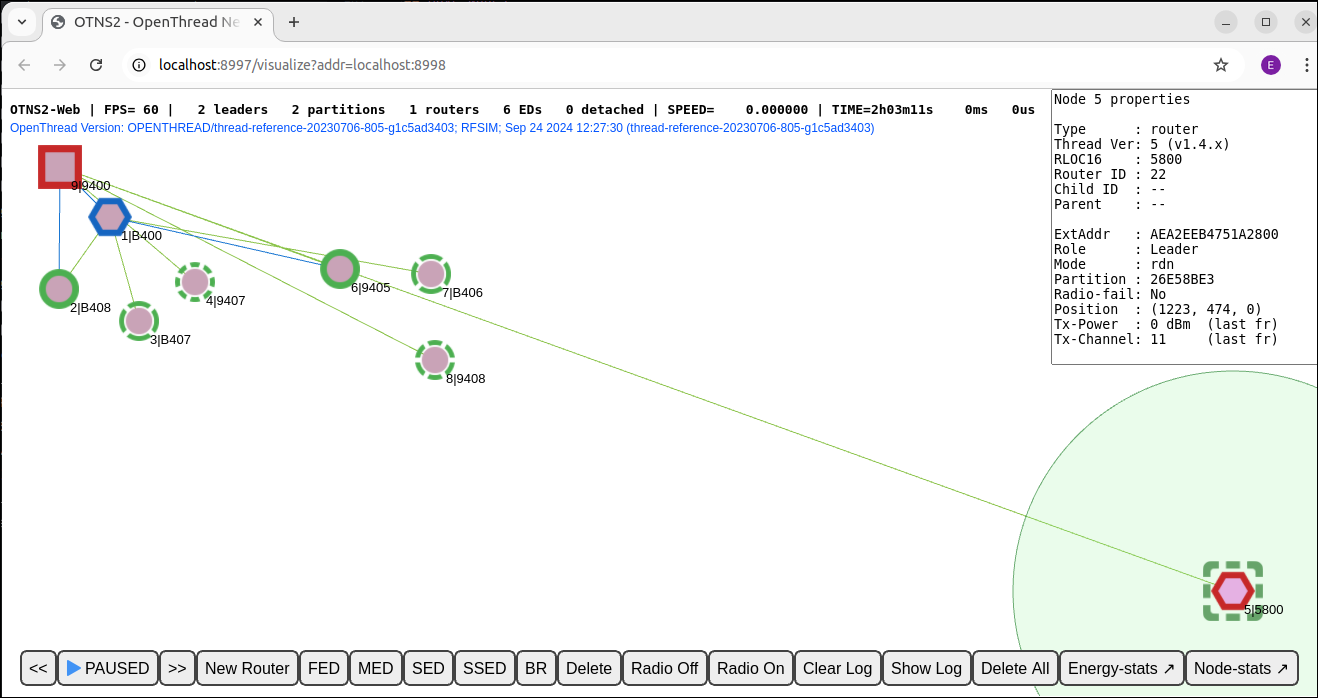
Note that a single green line is still drawn between node 5 and node 9. This is often due to stale information about a child, which is still kept in the child table of a former parent. Or it could be stale information about the former router-to-router link between node 9 and node 5. (Or possibly, in this case, even a rendering bug.) Eventually, stale information is cleaned up on the nodes after the appropriate timeout.
9. Delete Nodes
Delete nodes through OTNS-CLI
Delete node 5:
> del 5
Done
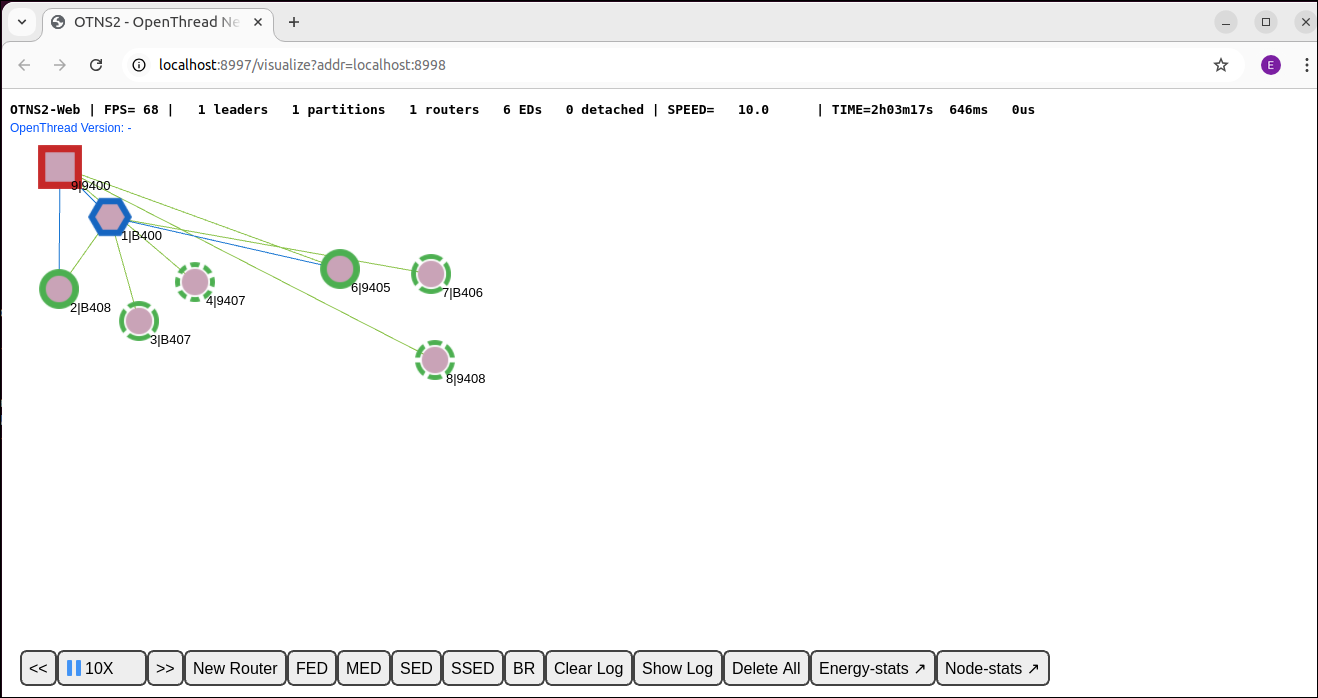
Node 5 should disappear from the simulation:
Delete nodes through OTNS-Web
Select the Border Router node 9 and click the  button on the
 Action Bar to delete node 9:
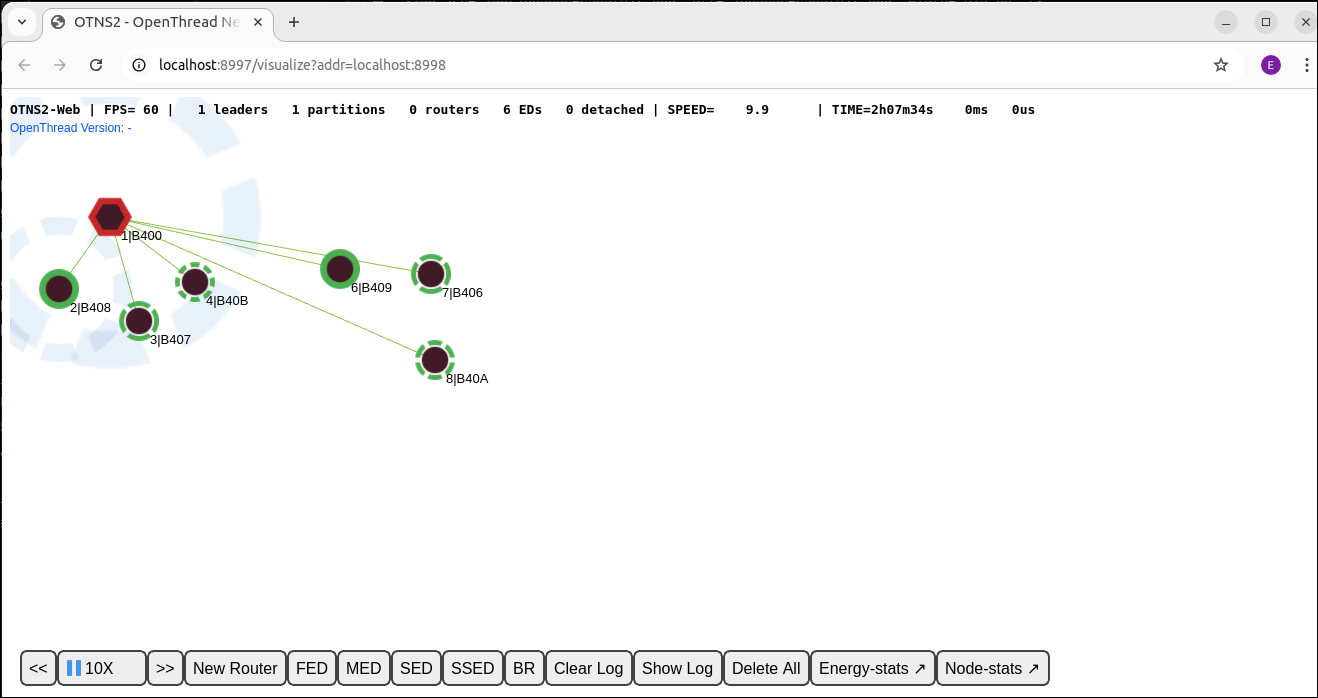
Node 1 should become Leader of a new partition and all remaining nodes will attach as a Child to node 1.
10. OTNS-CLI Node Context
OTNS-CLI provides node context mode for easy interaction with nodes to help developers diagnose a node's status. Also node actions can be initiated from this mode.
Enter node context mode
Enter the node context of node 1:
> node 1
Done
node 1>
The CLI prompt changed to node 1> , indicating the current node context. You can type in OpenThread CLI commands to be executed on the node as if you are interacting with the node directly.
Execute commands in node context
node 1> state
leader
Done
node 1> channel
11
Done
node 1> panid
0xface
Done
node 1> networkname
otns
Done
node 1> ipaddr
fdde:ad00:beef:0:0:ff:fe00:fc00
fdde:ad00:beef:0:0:ff:fe00:b400
fd00:f00d:cafe:0:2505:8719:3685:ebfb
fdde:ad00:beef:0:4fd9:b9ba:44e0:96cb
fe80:0:0:0:e86a:e07:ec97:777
Done
Switch to another node context
node 1> node 2
Done
node 2>
Exit node context
node 1> exit
Done
>
An alternative way to exit node context is the node 0 command.
11. Viewing node logs and packet captures
OpenThread node logs
By default, OTNS generates detailed log files for all simulated OpenThread nodes. These can be viewed in the ./tmp directory. The filename is 0_. For example, a log file excerpt is shown below:
7616488 00:00:06.326 [I] MeshForwarder-: Received IPv6 UDP msg, len:90, chksum:5915, ecn:no, from:ca72650db7b856af, sec:no, prio:net, rss:-58.0
7616488 00:00:06.326 [I] MeshForwarder-:     src:[fe80:0:0:0:c872:650d:b7b8:56af]:19788
7616488 00:00:06.326 [I] MeshForwarder-:     dst:[ff02:0:0:0:0:0:0:1]:19788
7616488 00:00:06.326 [D] Mle-----------: Receive MLE message
7616488 00:00:06.326 [D] Mac-----------: Idle mode: Radio receiving on channel 11
7657544 00:00:06.367 [D] Mac-----------: ==============================[RX len=063]==============================
7657544 00:00:06.367 [D] Mac-----------: | 41 D8 7F CE FA FF FF 46 | 74 5A 33 9E 76 51 4E 7F | A......FtZ3.vQN. |
7657544 00:00:06.367 [D] Mac-----------: | 3B 02 F0 4D 4C 4D 4C 81 | E6 00 15 03 00 00 00 00 | ;..MLML......... |
7657544 00:00:06.367 [D] Mac-----------: | 00 00 00 01 46 86 7D FE | 06 CC DB 94 86 9C 88 0B | ....F.}......... |
7657544 00:00:06.367 [D] Mac-----------: | 1C 1E 26 9B 8D 21 2E 65 | 53 5A 43 4E A2 59 D6    | ..&..!.eSZCN.Y.  |
7657544 00:00:06.367 [D] Mac-----------: ------------------------------------------------------------------------
7657544 00:00:06.367 [I] MeshForwarder-: Received IPv6 UDP msg, len:84, chksum:81e6, ecn:no, from:4e51769e335a7446, sec:no, prio:net, rss:-48.0
7657544 00:00:06.367 [I] MeshForwarder-:     src:[fe80:0:0:0:4c51:769e:335a:7446]:19788
7657544 00:00:06.367 [I] MeshForwarder-:     dst:[ff02:0:0:0:0:0:0:2]:19788
7657544 00:00:06.367 [D] Mac-----------: Idle mode: Radio receiving on channel 11
7833912 00:00:06.543 [I] Mle-----------: AttachState ParentReq -> Idle
7833912 00:00:06.543 [N] RouterTable---: Allocate router id 12
7833912 00:00:06.543 [N] Mle-----------: RLOC16 fffe -> 3000
7833912 set node RLOC16: fffe -> 3000
7833912 00:00:06.543 [D] SubMac--------: RadioShortAddress: 0x3000
7833912 00:00:06.543 [N] Mle-----------: Role detached -> leader
7833912 00:00:06.543 [N] Mle-----------: Partition ID 0x24c35f10
7833912 00:00:06.543 [I] RouterTable---: Route table
7833912 00:00:06.543 [I] RouterTable---:     12 0x3000 - me - leader
The absolute simulation time in microseconds is shown on the left. The hh:mm:ss timestamp shows the OpenThread node's own log timestamp, which may differ from the absolute simulation time.
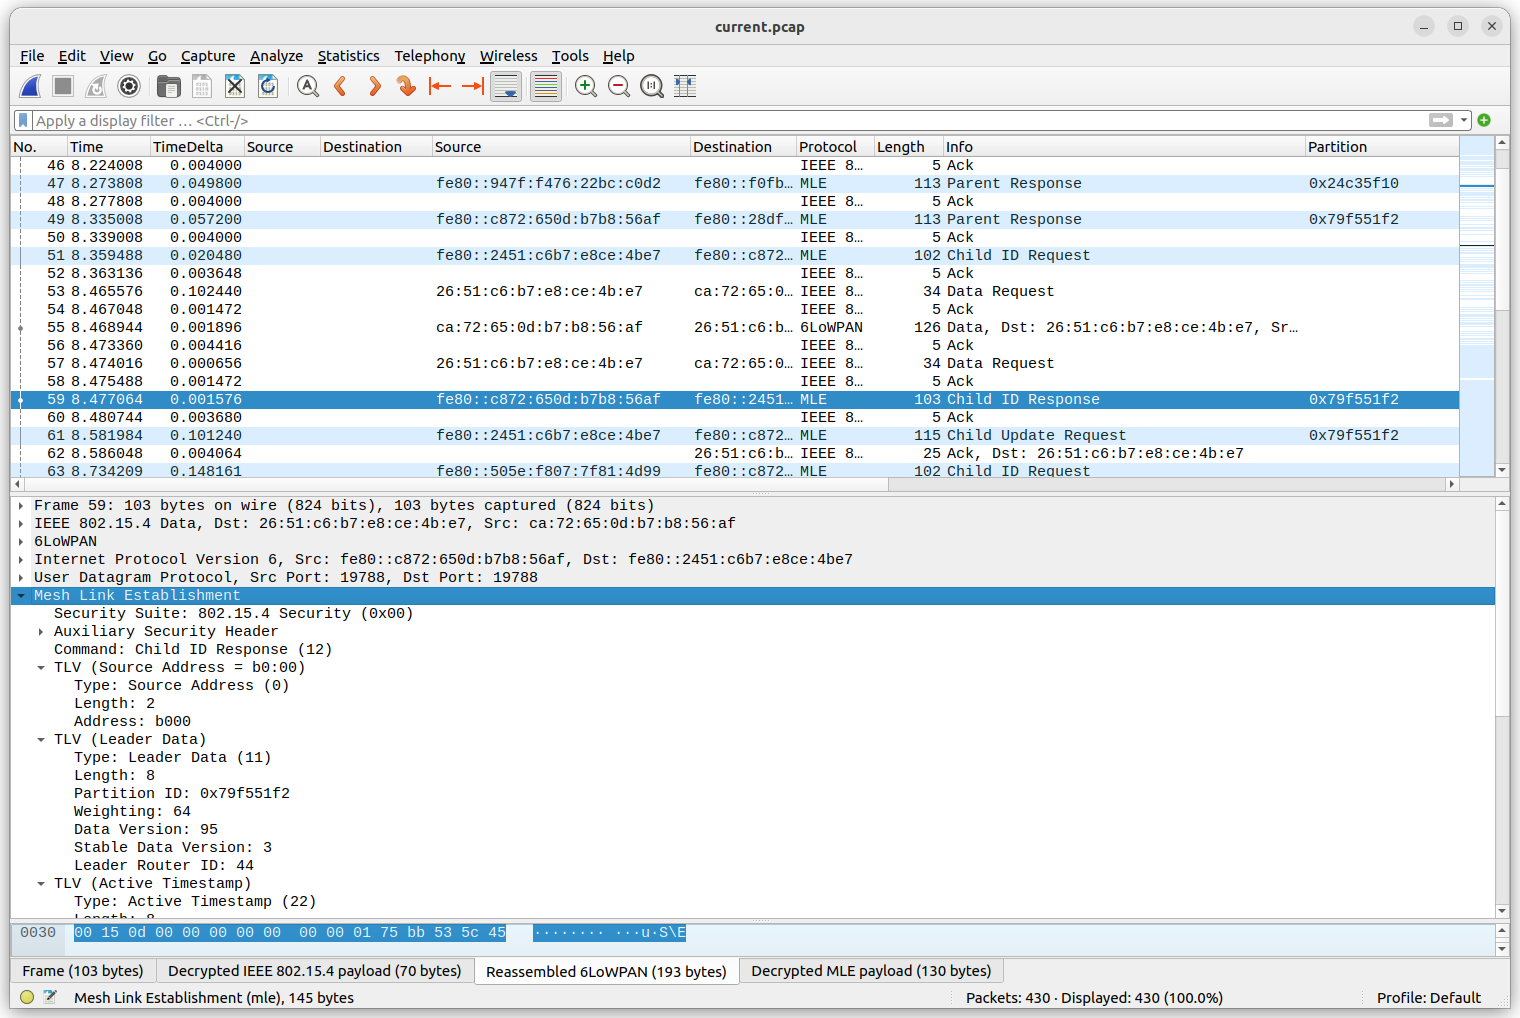
Wireshark packet captures
By default, all transmitted IEEE 802.15.4 frames are captures in the PCAP file current.pcap. This file can be read by Wireshark during or after the simulation. Due to the link-layer encryption of Thread, a one-time configuration action in Wireshark is needed to set the decryption key for OTNS properly. By default, one well-known Network Key is used so that frame decryption by Wireshark is made easy.
See the below screenshot for an example of OpenThread packet inspection in Wireshark.
To configure the decryption key, select in the menu Edit -> Preferences. Then in the preferences window, select Protocols -> IEEE 802.15.4. Click the Edit... button next to "Decryption Keys". Click + to create a new entry and enter the key 00112233445566778899aabbccddeeff (32 characters) and select "Thread hash" in the "Key hash" field. The "Decryption key index" can be left to 0. Then click OK, and OK again. Now the OTNS PCAP file should properly decrypt when loaded.
The timestamps shown in the "Time" column (in seconds) correspond to the absolute simulation time values shown in the OpenThread node logs. This makes it easier to correlate log messages with transmitted or received radio frames. However, the values are typically not identical up to single microsecond precision: the simulated IEEE 802.15.4 radio hardware may add some additional delay, after a radio frame is requested to be sent by the OpenThread stack.
12. Congratulations
Congratulations, you've successfully executed your first OTNS simulation!
You've learned how to install OTNS and its dependencies. You started an OTNS simulation with OpenThread simulated nodes. You've learned how to manipulate the simulation in various ways through both OTNS-CLI and OTNS-Web.
You now know what OTNS is and how you can use OTNS to simulate OpenThread networks.
What's next?
Check out some of these codelabs...
- Simulating a Thread network with OpenThread
- Simulating a Thread network using OpenThread in Docker
- Build a Thread network with nRF52840 boards and OpenThread