[View source on GitHub](https://github.com/openthread/ot-docs/tree/main/site/en/guides/border-router/espressif-esp32.md)
 **By** [Jiacheng
Guo](https://github.com/gjc13) Contributor from Espressif  **By** [Zhang
Wenxu](https://github.com/zwx1995esp) Contributor from Espressif
ESP Thread border router is a FreeRTOS-based implementation running on a combination of Espressif's Wi-Fi and 802.15.4 SoCs.
Hardware requirements:
Espressif provides an [ESP Border Router Board](https://www.espressif.com/en/news/Thread_Border_Router_Certification) which integrates the host SoC (ESP32-S3) and the RCP (ESP32-H2) into one module.
You only need to connect the board to the ESP32-S3 (main SoC) port. The main SoC automatically programs the Thread co-processor.
## Hardware platforms
[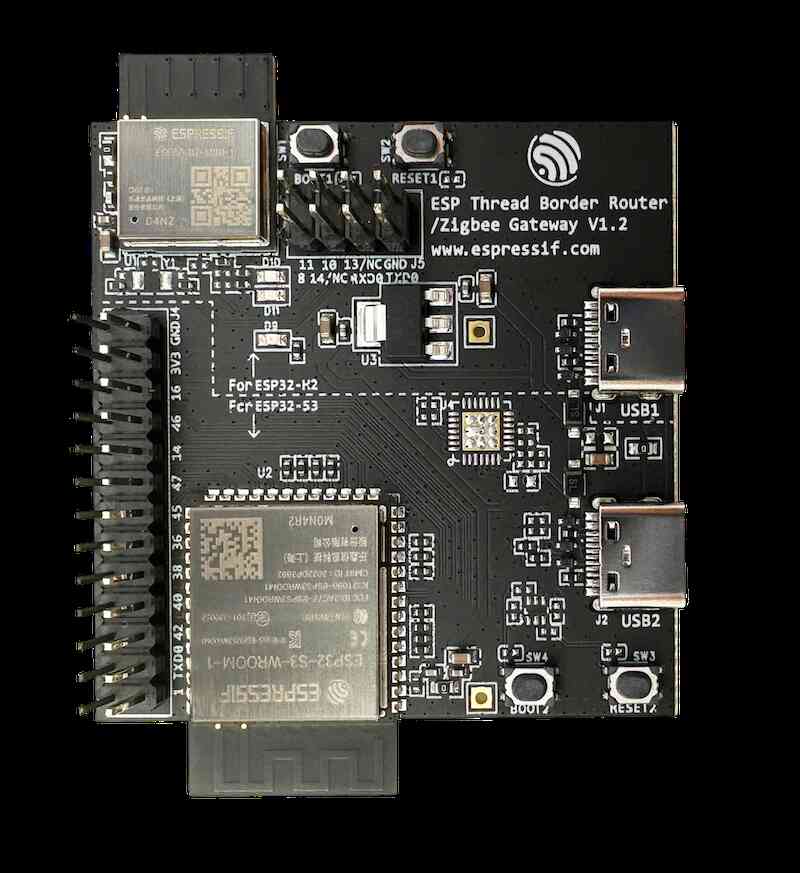](https://openthread.io/guides/images/otbr-esp-br-board.jpg)ESP Thread Border Router Board
## Set up Repositories
> [!NOTE]
> **Note:** This guide is specific to Linux/macOS.
To set up the environment and for information specific to Windows, please follow the [official installation guide](https://docs.espressif.com/projects/esp-idf/en/stable/esp32s3/get-started/index.html#installation-step-by-step).
Clone the [esp-idf](https://github.com/espressif/esp-idf) and the [esp-thread-br](https://github.com/espressif/esp-thread-br) repository.
git clone -b v5.1.2 --recursive https://github.com/espressif/esp-idf.git
cd esp-idf
./install.sh
. ./export.sh
cd ..
git clone -b v1.0 --recursive https://github.com/espressif/esp-thread-br.git
> [!NOTE]
> **Note:** The `esp-thread-br` branch v1.0 with the `esp-idf` branch v5.1.2 is one of the release versions. For the latest version of `esp-thread-br`, please refer to [ESP Thread Border Router Codelab: 2.1.1. Set up the Repositories](https://docs.espressif.com/projects/esp-thread-br/en/latest/dev-guide/build_and_run.html#set-up-the-repositories).
## Configure the Thread and the Wi-Fi network
The border router will automatically join the Wi-Fi network and create a new Thread network if there is not one in its storage.
The network parameters can be configured in the config menu:
cd esp-thread-br/examples/basic_thread_border_router
idf.py menuconfig
The network configuration items are:
- Enable automatic start mode in Thread Border Router: **ESP Thread Border Router Example \> Enable the automatic start mode in Thread Border Router.**
- Wi-Fi SSID and PSK: **Example Connection Configuration \> connect using Wi-Fi interface**
- Thread network parameters: **Component config \> OpenThread \> Thread Operational Dataset**
## Build and run the border router
Build the `esp-idf/examples/openthread/ot_rcp` example. The firmware doesn't need to be explicitly flashed to a device. It will be included in the Border Router firmware and flashed to the ESP32-H2 chip upon first boot (or the RCP firmware changed).
cd ${IDF_PATH}/examples/openthread/ot_rcp
idf.py set-target esp32h2
idf.py build
Then go back to the `basic_thread_border_router` example folder.
cd esp-thread-br/examples/basic_thread_border_router
idf.py set-target esp32s3
idf.py build
idf.py -p flash monitor
Now you'll see the border router output in the ESP32S3 monitor. It also provides an interactive OpenThread command line:
state
leader
Done
>
## Supported features
- Border agent for external commissioners.
- IPv6 bidirectional connectivity.
- SRP service registration and advertising proxy.
- mDNS discovery proxy.
- NAT64.
- Multicast forwarding.
- Web GUI based REST API.
- OTA.
For more using of the ESP Thread Border Router, you can refer to [ESP Thread Border Router Codelab](https://docs.espressif.com/projects/esp-thread-br/en/latest/codelab/index.html)